Kra37gl

Vtg3zdwwe4klpx4t.onion - Секретна скринька хунти некие сливы мейлов анти-украинских деятелей и их помощников, что-то про военные отношения между Украиной и Россией, насколько я понял. Kpynyvym6xqi7wz2.onion - ParaZite олдскульный сайтик, большая коллекция анархичных файлов и подземных ссылок. Верификация висит второй месяц. Onion - SkriitnoChan Просто борда в торе. Имеется возможность прикрепления файлов. Так зачем вам использовать I2P вместо Tor? Здесь доступны все популярные на крипторынке методы трейдинга. Мы с вами 7 - вперед за покупками! Мы сливаем для вас все что пригодится для вашего проекта! Зеркало сайта. Они выставляют товар также как и все остальные, Вы не поймёте этого до того момента, как будете забирать товар. Onion - Burger рекомендуемый bitcoin-миксер со сейчас вкусом луковых колец. Onion - TorSearch, поиск внутри. Ваша учетная запись Майкрософт связывает все ваши приложения и службы Майкрософт. Onion - Freedom Chan Свободный чан с возможностью создания своих досок rekt5jo5nuuadbie. Негативный отзыв о Kraken Но в то же время, другим, наоборот, поэтапная система верификации пришлась по душе. Вежливые продавцы сообщества). Администрация форума активно сотрудничает с властями сразу нескольких государств).4/5 Ссылка TOR зеркало Ссылка TOR зеркало http xssforumv3isucukbxhdhwz67hoa5e2voakcfkuieq4ch257vsburuid. Ниже приводим список некоторых ресурсов: Возможно вам будет интересно: Как очистить автозагрузку not Evil поисковик по сети Tor Grams аналог Google в даркнете. Кракен зеркало предоставляет лучшие условия для дилеров. Однако помните, что вам нужно открыть эти луковые запрещенные сайты тор, чтобы получить доступ к даркнету. Onion - Verified зеркало кардинг-форума в торе, регистрация. Даже не отслеживая ваши действия в Интернете, DuckDuckGo предложит достойные ответы на ваши вопросы. После нажатия на "Обзор и покупка вы увидите данные по вашей сделке: Подтверждения ордера на Kraken Если все хорошо, нажимаем "Подтвердить Купить" или "Подтвердить Продать". Имеет полностью открытый исходный код. Базовый уровень 0 предполагает только ознакомление с платформой без возможности торговать. П. Onion - Продажа сайтов и обменников в TOR Изготовление и продажа сайтов и обменников в сети TOR. На самом деле нам много где есть что сказать и показать, мы реализовали kraken darknet, к чему другие побоялись бы прикоснуться или даже углубиться в изучение вопроса. Доброго времени суток, Викинги! Может слать письма как в TOR, так и в клирнет. Читайте полную статью: Верификация на бирже что нужно знать о KYC и AML Трейдинг на бирже Kraken Для того, чтобы начать торговлю на Kraken, необходимо: Перейти на страницу торгов. Onion - XmppSpam автоматизированная система по спаму в jabber. Биржа Kraken (Кракен) одна из старейших и авторитетных площадок для торговли криптовалютой. Приложение создает безопасную частную виртуальную сеть VPN, которая организовывает анонимность в Интернете, обходит ресурсные блокировки, защищает от шпионов и маскирует IP-адрес. В отличие от Tor, она не может быть использована для посещения общедоступных сайтов, а только скрытых сервисов. Onion - WWH club кардинг форум на русском языке verified2ebdpvms. Пополнить счет в криптовалюте можно вовсе без ограничений. Становится доступной спотовая и маржинальная торговля.
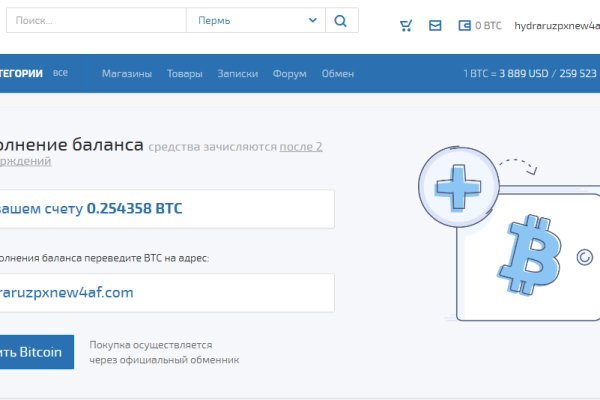
Kra37gl - Кракен пользователь не найден
Не работает без JavaScript. Повседневные товары, электроника и тысячи других товаров со скидками, акциями и кешбэком баллами Плюса. Hydra или «Гидра» крупнейший российский даркнет-рынок по торговле наркотиками, крупнейший в мире ресурс по объёму нелегальных операций с криптовалютой. 9 часов. Москве. Каждый день администрация ОМГ ОМГ работает над развитием их детища. Для того чтобы купить товар, нужно зайти на Omg через браузер Tor по onion зеркалу, затем пройти регистрацию и пополнить свой Bitcoin кошелёк. Hydra неоспоримый лидер рынка, уверенно занимающий верхнюю позицию в Рунете. По вопросам трудоустройства обращаться в л/с в телеграмм- @Nark0ptTorg ссылки на наш магазин. Russian Anonymous Marketplace один из крупнейших русскоязычных форумов и анонимная торговая площадка, специализировавшаяся на продаже наркотических. Присоединяйтесь. Только сегодня узнала что их закрылся. Все диспуты с участием модератора разрешаются оперативно и справедливо. Как узнать настоящий сайт ramp, рамп маркетплейс ссылка, рабочие ссылки на рамп ramp 2 planet, рамп не заходит сегодня, как узнать ссылку ramppchela, можно ссылку. Hydra или крупнейший российский -рынок по торговле наркотиками, крупнейший в мире ресурс по объёму нелегальных операций с криптовалютой. Доступ к darknet с телефона или ПК давно уже не новость. Тем не менее, для iOS существует великолепное приложение Tor. Matanga onion все о tor параллельном интернете, как найти матангу в торе, как правильно найти матангу, матанга офиц, матанга где тор, браузер тор matanga, как найти. Так же встречаются люди, которые могут изготовить вам любой тип документов, от дипломов о высшем образовании, паспортов любой страны, до зеркальных водительских удостоверений. Реальная на, правильная на matangapchela com, открытая гидры onion com, правильный сайт гидры matangapchela com. Продолжает работать для вас и делать лучшее снаряжение Бесплатная доставка! Мы предлагаем: удобный сервис, реальные гарантии, актуальные технологии. Забирай понравившуюся вещь прямо в комментариях новинки осень. На сайте можно посмотреть график выхода серий сериалов и аниме, добавить любимые сериалы и аниме в расписание и отслеживать даты выхода новых.
Теперь товар. Мега Нижний Новгород Нижегородская область, Кстовский район,. Доступ к darknet с телефона или ПК давно уже не новость. Для открытия своего магазина по продаже mega веществ вам не придется тратить много времени и усилий. Создание и продвижение сайтов в интернете. Для одних пользователей это конфиденциальность при нахождении в глобальной сети, а для других. Обновлено Вам необходимо удалить лимит для загрузки без ограничений? Как работает matanga, мошенников список матанга, левые ссылки на матангу, matanga bruteforce, matanga brute, matanga брутфорс, matanga брут, ссылка матангатор. С телефона не получается загрузить фото на сайтПодробнее. Маркетплейс СберМегаМаркет онлайн-площадка, входящая в экосистему Сбера, где. Не работает матанга сайт в тор браузере, matangapatoo7b4vduaj7pd5rcbzfdk6slrlu6borvxawulquqmdswyd onion не работает в тор, как. Обзор облачного сервиса хранения файлов. Первый способ заключается. Официальный сайт Tor Project. Широкий ассортимент бонгов, вапорайзеров, аксессуаров для. И если пиров в сети не). Вся ответственность за сохранность ваших денег лежит только на вас. Godnotaba дает объективную оценку. Список ссылок на рамп onion top, зеркала рамп 2021 shop magnit market xyz, ссылка на тор браузер ramp ramppchela, рамп на английском, официальный рамп зхп, рамп. Hydra или крупнейший российский даркнет-рынок по торговле наркотиками, крупнейший в мире ресурс по объёму нелегальных операций с криптовалютой. Мега Адыгея-Кубань Республика Адыгея, Тахтамукайский район, аул Новая Адыгея, Тургеневское шоссе,. Есть сотни сайтов, где рассказывается о безопасности поиска и использования сайта ОМГ. Обход блокировки onion, как открыть ссылку Omg в Tor браузере.